0%

Java画图板

Java界面实现的简单绘图板

创建界面与面板

创建界面与实现监听的具体方式笔者已经在之前的博客中进行了详细的介绍,这里就不再赘述。

首先我们创建一个界面,并在界面中设置面板区域:

1
2
3
4
5
6
7
8
9
10
11
12
13
14
15
16
17
18
19
20
21
22
		JFrame jf=new JFrame();
jf.setTitle("绘图板"); jf.setSize(800, 800);
jf.setDefaultCloseOperation(3);
jf.setLocationRelativeTo(null);
jf.setResizable(false);
// 创建界面
jf.setLayout(new BorderLayout());
// 规定排列方式
JPanel jpn=new JPanel();
jpn.setPreferredSize(new Dimension(0,80));
jpn.setBackground(new Color(111,119,219));
JPanel jps=new JPanel();
jps.setPreferredSize(new Dimension(0,120));
jps.setBackground(new Color(61,232,254));
JPanel jpe=new JPanel();
jpe.setPreferredSize(new Dimension(20,0));
jpe.setBackground(new Color(61,232,254));
JPanel jpw=new JPanel();
jpw.setPreferredSize(new Dimension(20,0));
jpw.setBackground(new Color(61,232,254));
JPanel jpc=new JPanel();
// 添加位于界面四个方向的面板区域

在这几行代码中,我们为每个面板规定了大小和背景色。但要注意的有:

  • 南北(上下)方向的面板宽度规定为整个界面,东西(左右)方向的面板高度规定为顶格至南北方向面板,所以我们无需再考虑已经规定的长度,写成0即可。

  • 中央的面板的大小在其余四个方向面板规定后就无需设置,当然,设置了也没有问题,但要注意大小,不然可能会有“画出界”的情况发生。

  • 设置的背景色可以用color(R,G,B)来实现,用一般电脑自带的画图软件就能够获取心仪颜色的参数:
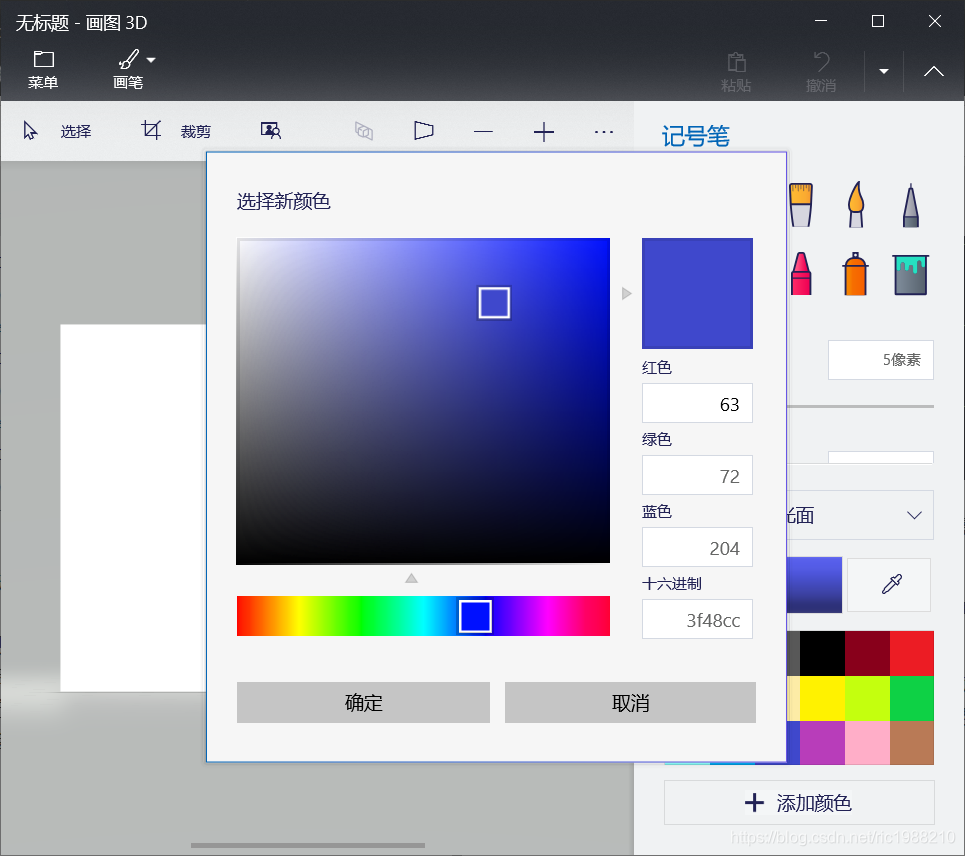
在这里插入图片描述

记得将每个面板添加到界面中jf.add(jpn,BorderLayout.NORTH); ......jf.add(jpc,BorderLayout.CENTER); 并设置其添加方向。
这样一个画图板界面就初步实现了:
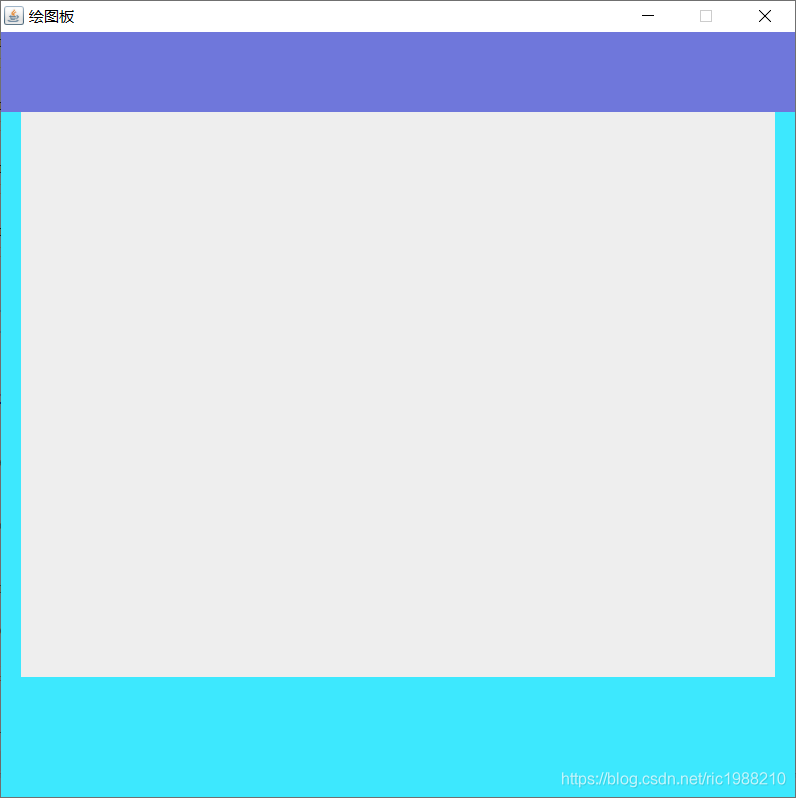
在这里插入图片描述 ### 不同画图选项按钮的添加 因为需要添加的按钮较多,直接依次写入会使得代码显得冗长,所以我们定义两个数组(规定返回值的类型),用for循环来帮我们添加
1
2
3
4
5
6
7
8
9
10
11
12
13
14
15
16
Color[] btnColors = {Color.red,Color.blue,Color.orange,Color.yellow,Color.black};
for (int i = 0; i < btnColors.length; i++) {
JButton cbtn = new JButton();
cbtn.setPreferredSize(new Dimension(60,28));
cbtn.setBackground(btnColors[i]);
jpn.add(cbtn);
cbtn.addActionListener(drl);
}
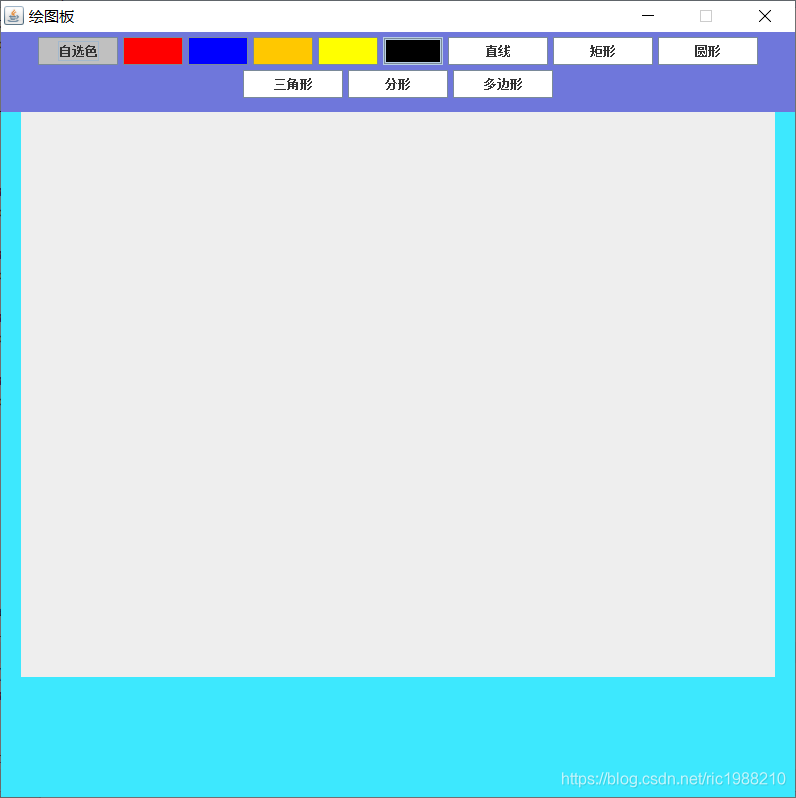
String[] btnStrings={"直线","矩形","圆形","三角形","分形","多边形"};
for (int j=0;j<6;j++){
JButton sbtn=new JButton(btnStrings[j]);
sbtn.setPreferredSize(new Dimension(100,28));
sbtn.setBackground(Color.WHITE);
jpn.add(sbtn);
sbtn.addActionListener(drl);
}
除了几个既定的颜色,我们再添加一个颜色自选按钮,稍后在实现监听中我们再对它进行更详细的解释:
1
2
3
4
5
JButton ccl=new JButton("自选色");
ccl.setPreferredSize(new Dimension(80,28));
ccl.setBackground(Color.LIGHT_GRAY);
jpn.add(ccl);
ccl.addActionListener(drl);
此时执行结果如下 在这里插入图片描述

画图动作的监听与实现

为了实现一个画图板,我们需要给监听器引用两个接口,即 MouseListener和ActionListener。我们先定义变量和抽象方法:

1
2
3
4
5
6
int x1, x2, y1, y2, x3, y3, x4, y4, x5, y5;
int count = 0,ncount=0;
int nx0,ny0,nx1,nx2,ny1,ny2;
Graphics graw;
String sbtn = "直线";
Pad3DBall pad3dball;

之后我们重载这些方法:

1
2
3
4
5
6
7
8
9
10
11
12
13
14
15
16
17
18
19
20
21
22
23
24
25
26
27
28
29
30
31
32
33
34
35
36
37
38
39
40
41
42
43
44
45
46
47
48
49
50
51
52
53
54
55
56
57
58
59
60
61
62
63
64
65
66
67
68
69
70
71
72
73
74
75
76
77
78
79
80
81
82
83
84
85
86
87
88
89
90
91
92
93
94
95
96
97
98
99
100
101
102
103
104
105
106
107
108
109
110
111
112
113
114
115
116
public void actionPerformed(ActionEvent e) {
sbtn = e.getActionCommand();
System.out.println(sbtn);

if (sbtn.equals("分形")) {
Pad3DBall pad3dball = new Pad3DBall();
pad3dball.intUI();
}

if (sbtn.equals("")) {
JButton cbtn = (JButton) e.getSource();
Color c1 = cbtn.getBackground();
graw.setColor(c1);

}
if (sbtn.equals("自选色")){
Color c2 = JColorChooser.showDialog(null, "颜色提取器", Color.LIGHT_GRAY);
graw.setColor(c2);
JButton ccl=(JButton) e.getSource();
ccl.setBackground(c2);
}
}
public void mouseClicked(MouseEvent e) {

if (sbtn.equals("三角形")) {
count++;
System.out.println("点击");
if (count == 1) {
x3 = e.getX();
y3 = e.getY();
} else if (count == 2) {
x4 = e.getX();
y4 = e.getY();
graw.drawLine(x3, y3, x4, y4);
} else if (count == 3) {
x5 = e.getX();
y5 = e.getY();
graw.drawLine(x3, y3, x5, y5);
graw.drawLine(x4, y4, x5, y5);
count = 0;
}
}

if (sbtn.equals("多边形")) {
ncount++;
System.out.println("单击");
if (ncount == 1) {
x3 = e.getX();
y3 = e.getY();
} else if(ncount==2){
x4 = e.getX();
y4 = e.getY();
graw.drawLine(x3, y3, x4, y4);
}
if (ncount>2){
nx1=e.getX();
ny1=e.getY();
graw.drawLine(nx1, ny1, x4, y4);
x4=nx1;
y4=ny1;
}
if (e.getClickCount()==2){
nx2=e.getX();
ny2=e.getY();
graw.drawLine(x4,y4, nx2, ny2);
graw.drawLine(nx2, ny2, x3, y3);
ncount=0;
}

}
}

public void mousePressed(MouseEvent e) {
x1 = e.getX();
y1 = e.getY();
System.out.println("按下");
}

public void mouseReleased(MouseEvent e) {
x2 = e.getX();
y2 = e.getY();

if (sbtn.equals("直线")) {
graw.drawLine(x1, y1, x2, y2);
}

if (sbtn.equals("矩形")) {

if (x2 >= x1) {
graw.drawRect(x1, y1, Math.abs(x2 - x1), Math.abs(y2 - y1));
} else {
graw.drawRect(x2, y2, Math.abs(x2 - x1), Math.abs(y2 - y1));
}

}

if (sbtn.equals("圆形")) {

if (x2 >= x1) {
graw.drawOval(x1, y1, Math.abs(x2 - x1), Math.abs(y2 - y1));
} else {
graw.drawOval(x2, y2, Math.abs(x2 - x1), Math.abs(y2 - y1));
}

}

System.out.println("松开");
}

public void mouseEntered(MouseEvent e) {
System.out.println("进入");
}

public void mouseExited(MouseEvent e) {
System.out.println("离开");
}

这其中鼠标监听器中的方法大家可以自行查看,具体方法为高亮MouseListener后同时按下Ctrl+鼠标左键。这其中有几点要注意:

  • 注意点的坐标,选择恰当绘图的起点,不然画出来的图形会“乱跑”。

  •          if (sbtn.equals("自选色")){
         Color c2 = JColorChooser.showDialog(null, "颜色提取器", Color.LIGHT_GRAY);
         graw.setColor(c2);
         JButton ccl=(JButton) e.getSource();
         ccl.setBackground(c2);		
     }
     
    1
    2
    3
    4
    5
    6
    7
    8
    	
    我们引用了Java的颜色提取器,它会在我们选定颜色后将按钮染成我们选定的颜色。注意,JColorChooser.showDialog(Component,String, Color— initialColor)的返回值为颜色,我们将其赋给变量C2。
    ```java
    DrawListener drl=new DrawListener();
    jpc.addMouseListener(drl);
    ......
    Graphics g=jpc.getGraphics();
    drl.graw=g;
    最后,我们将图像绘制在CENTER面板中,这样我们就可以用它来画一些简易的图象了! <img src="https://raw.githubusercontent.com/EDAttlee/edattlee.github.io/main/downloaded_images/20191023194128824.png" alt="在这里插入图片描述" style="zoom:67%">